Unreal Engine 5 projects are notoriously massive, largely consisting of heavy binary assets like textures, meshes, and compiled data. Consequently, feeding a UE5 codebase into AI tools like ChatGPT or Claude feels completely impossible. Fortunately, by extracting the underlying text representations of your blueprints and levels, you can successfully give your entire UE5 project to AI for complete structural analysis.
Phase 1: Preparing a Safe Project Workspace
Before extracting text assets, we must create an isolated workspace. Therefore, follow these initial steps to clean up unnecessary engine bulk.
Step 1: Duplicate Your Project Folder
First of all, create a complete copy of your original project folder to ensure your primary working directory remains perfectly safe.
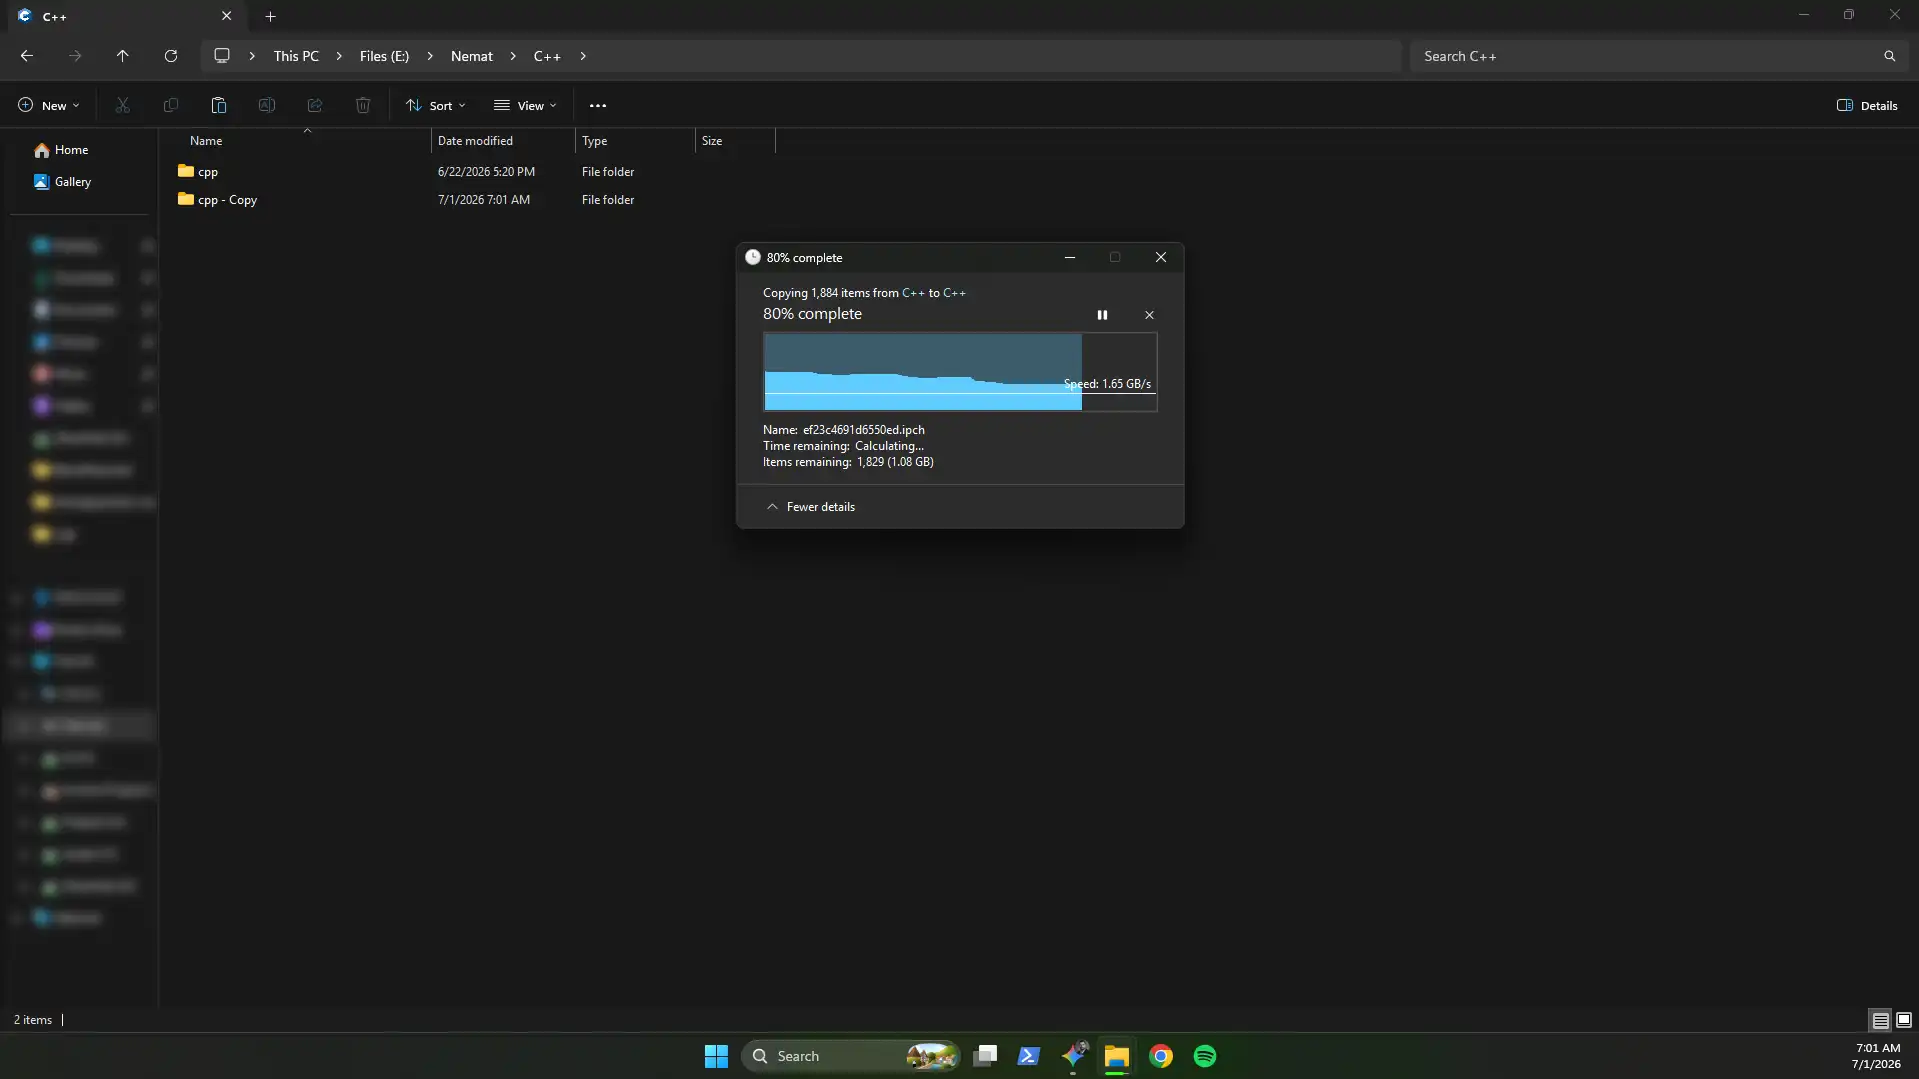
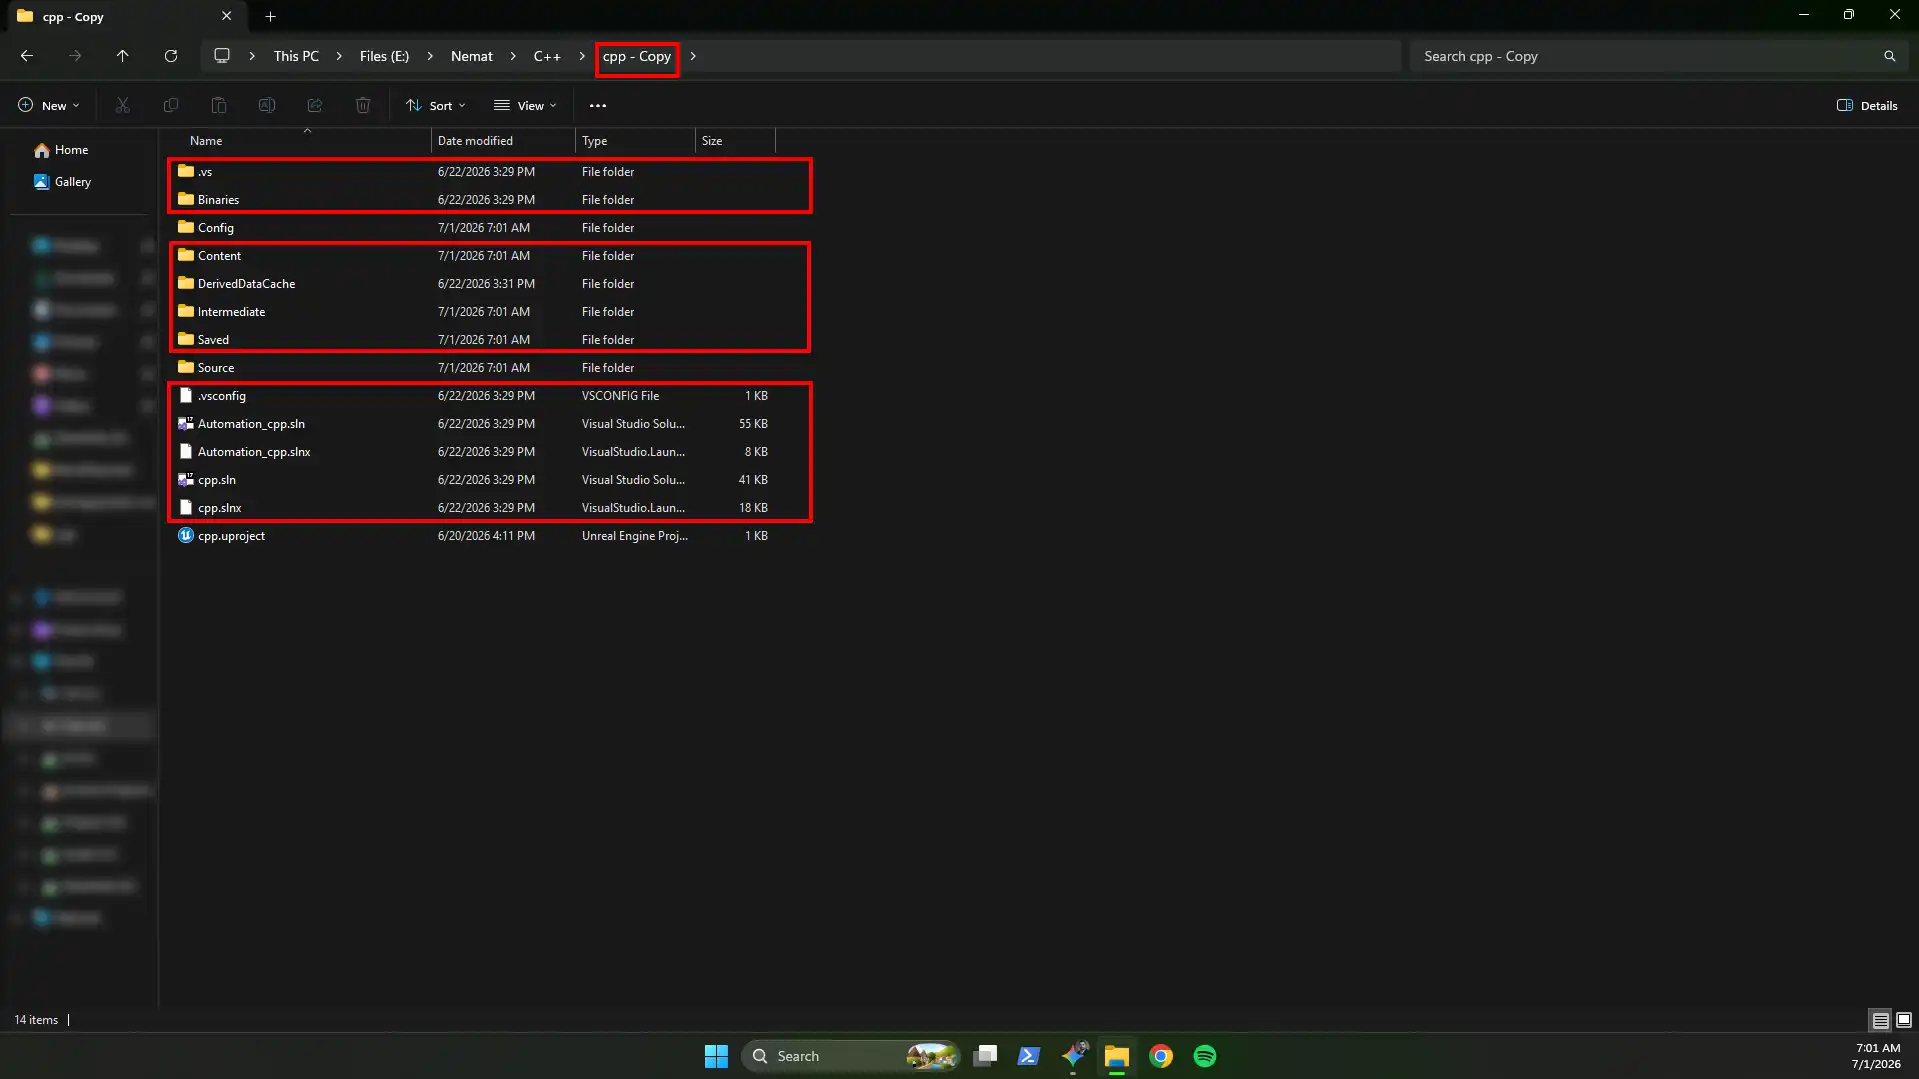
Step 2: Wipe the Content Folder inside the Copy
Subsequently, delete unnecessary temporary folders. Although Project2Markdown automatically ignores engine bloat, it is highly critical to wipe the Content folder inside this copy entirely, as we will replace it with lightweight text exports.
Phase 2: Bulk Exporting Unreal Engine Text Assets
In order to make blueprints and level data readable for AI, we need to convert them into standard text. As a result, we will utilize Unreal Engine’s native bulk exporter.
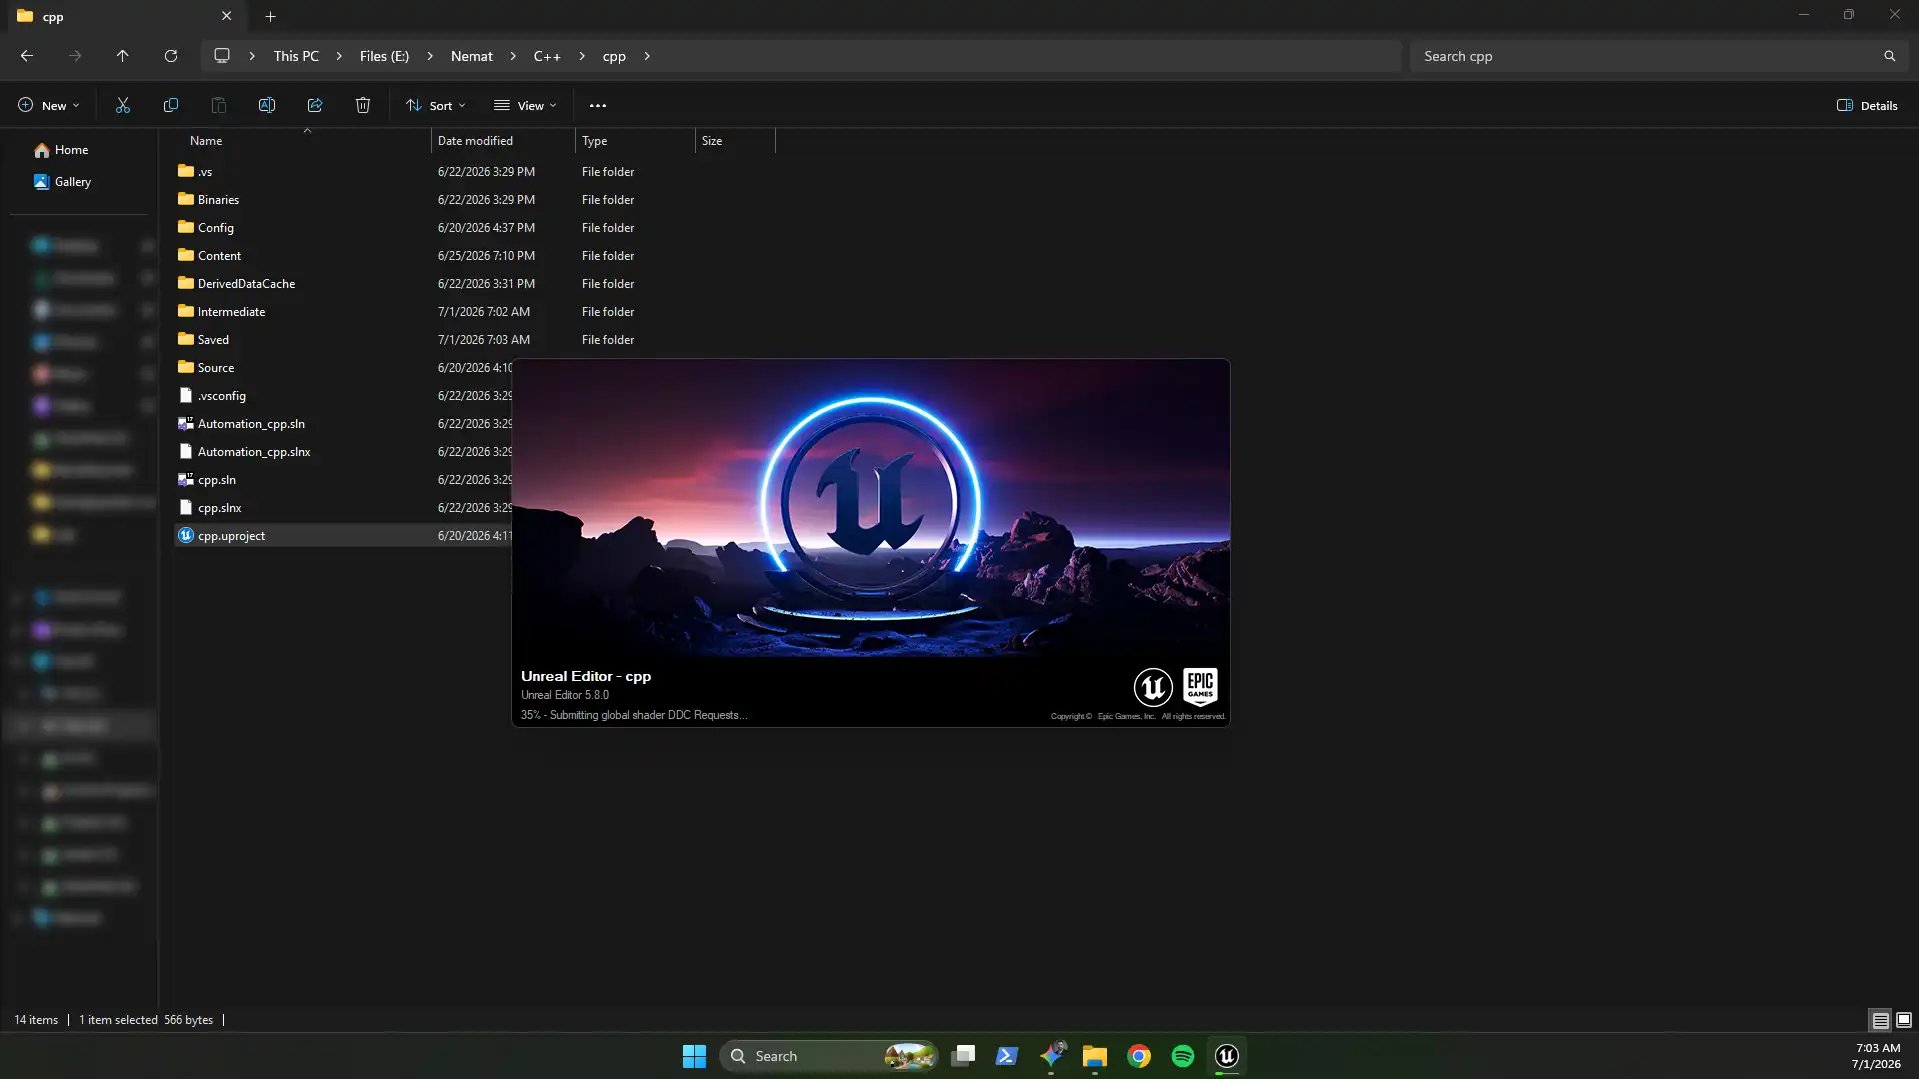
Step 3: Launch Your Original Project
Following the workspace preparation, open your original active project in Unreal Editor, not the duplicated folder we just modified.
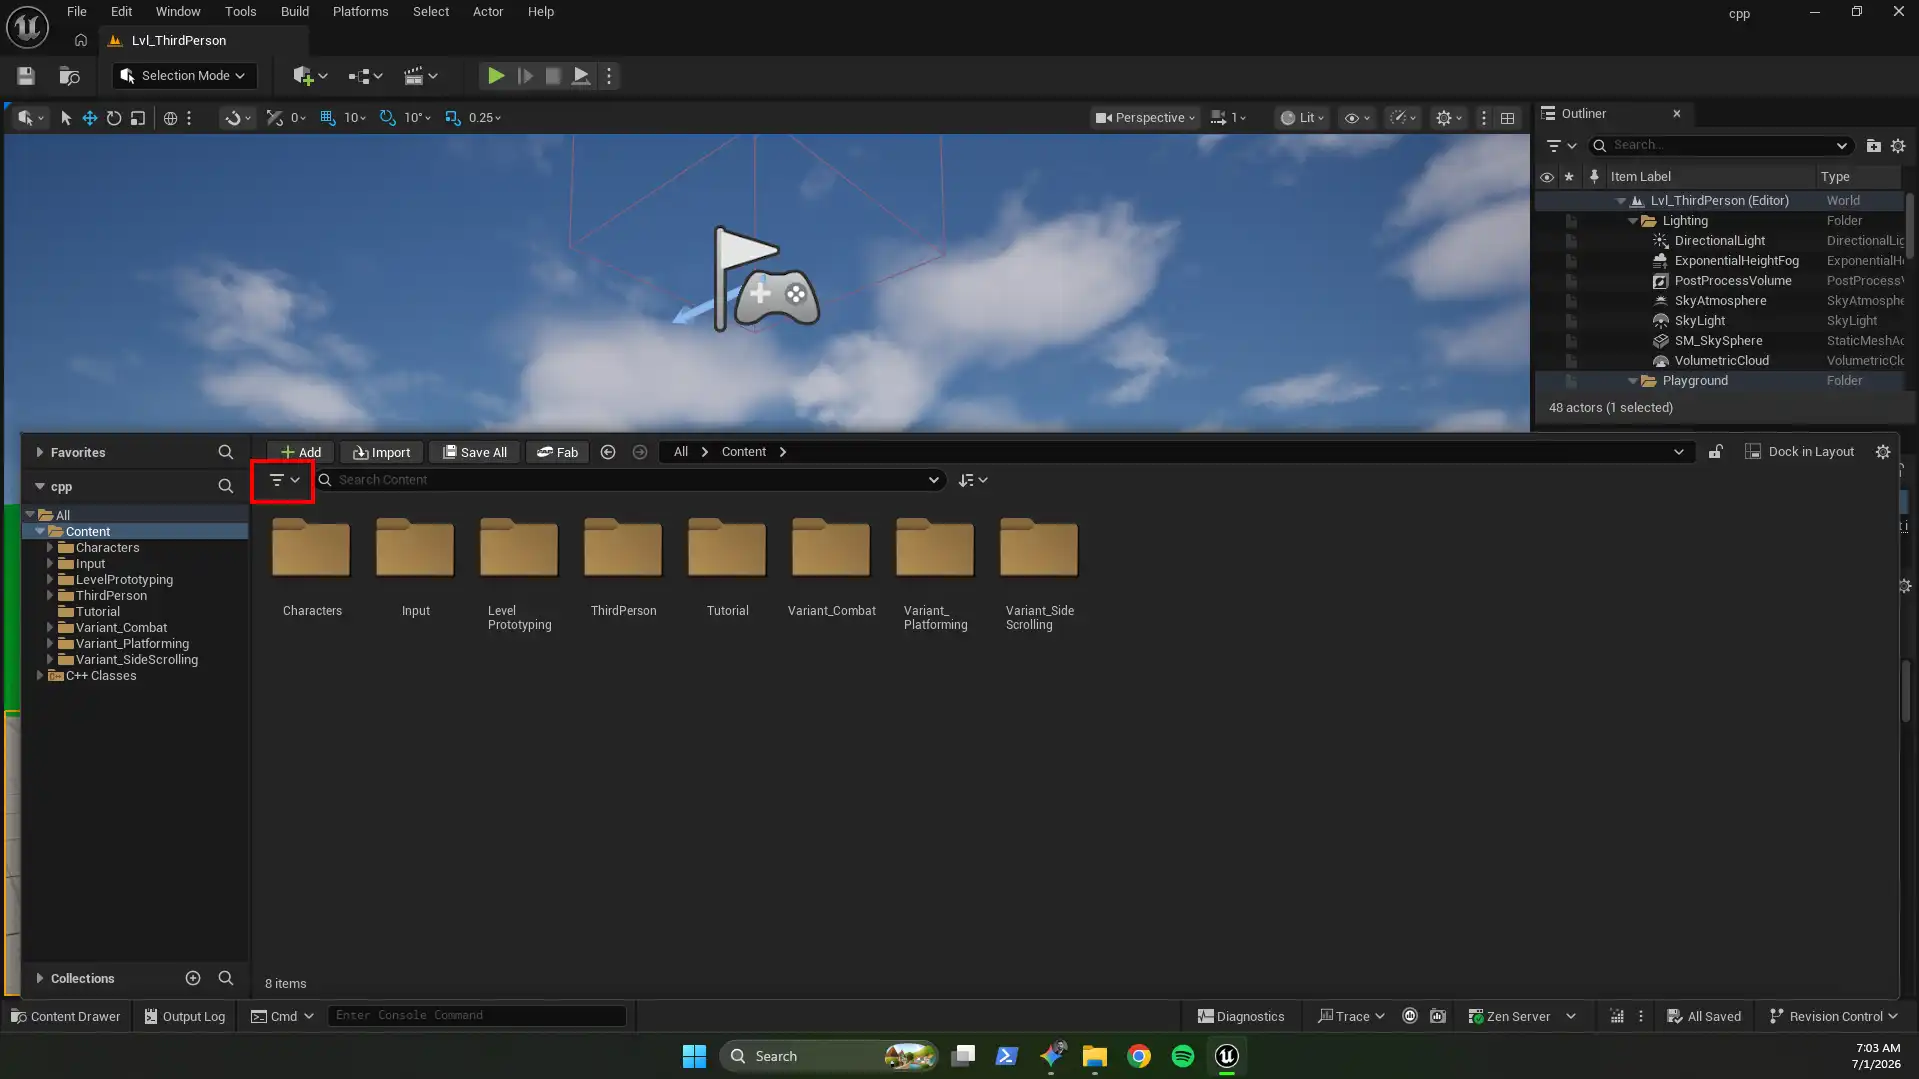
Step 4: Open Content Browser Filters
Next, navigate down to your Content Browser and open the advanced asset filtering panel.
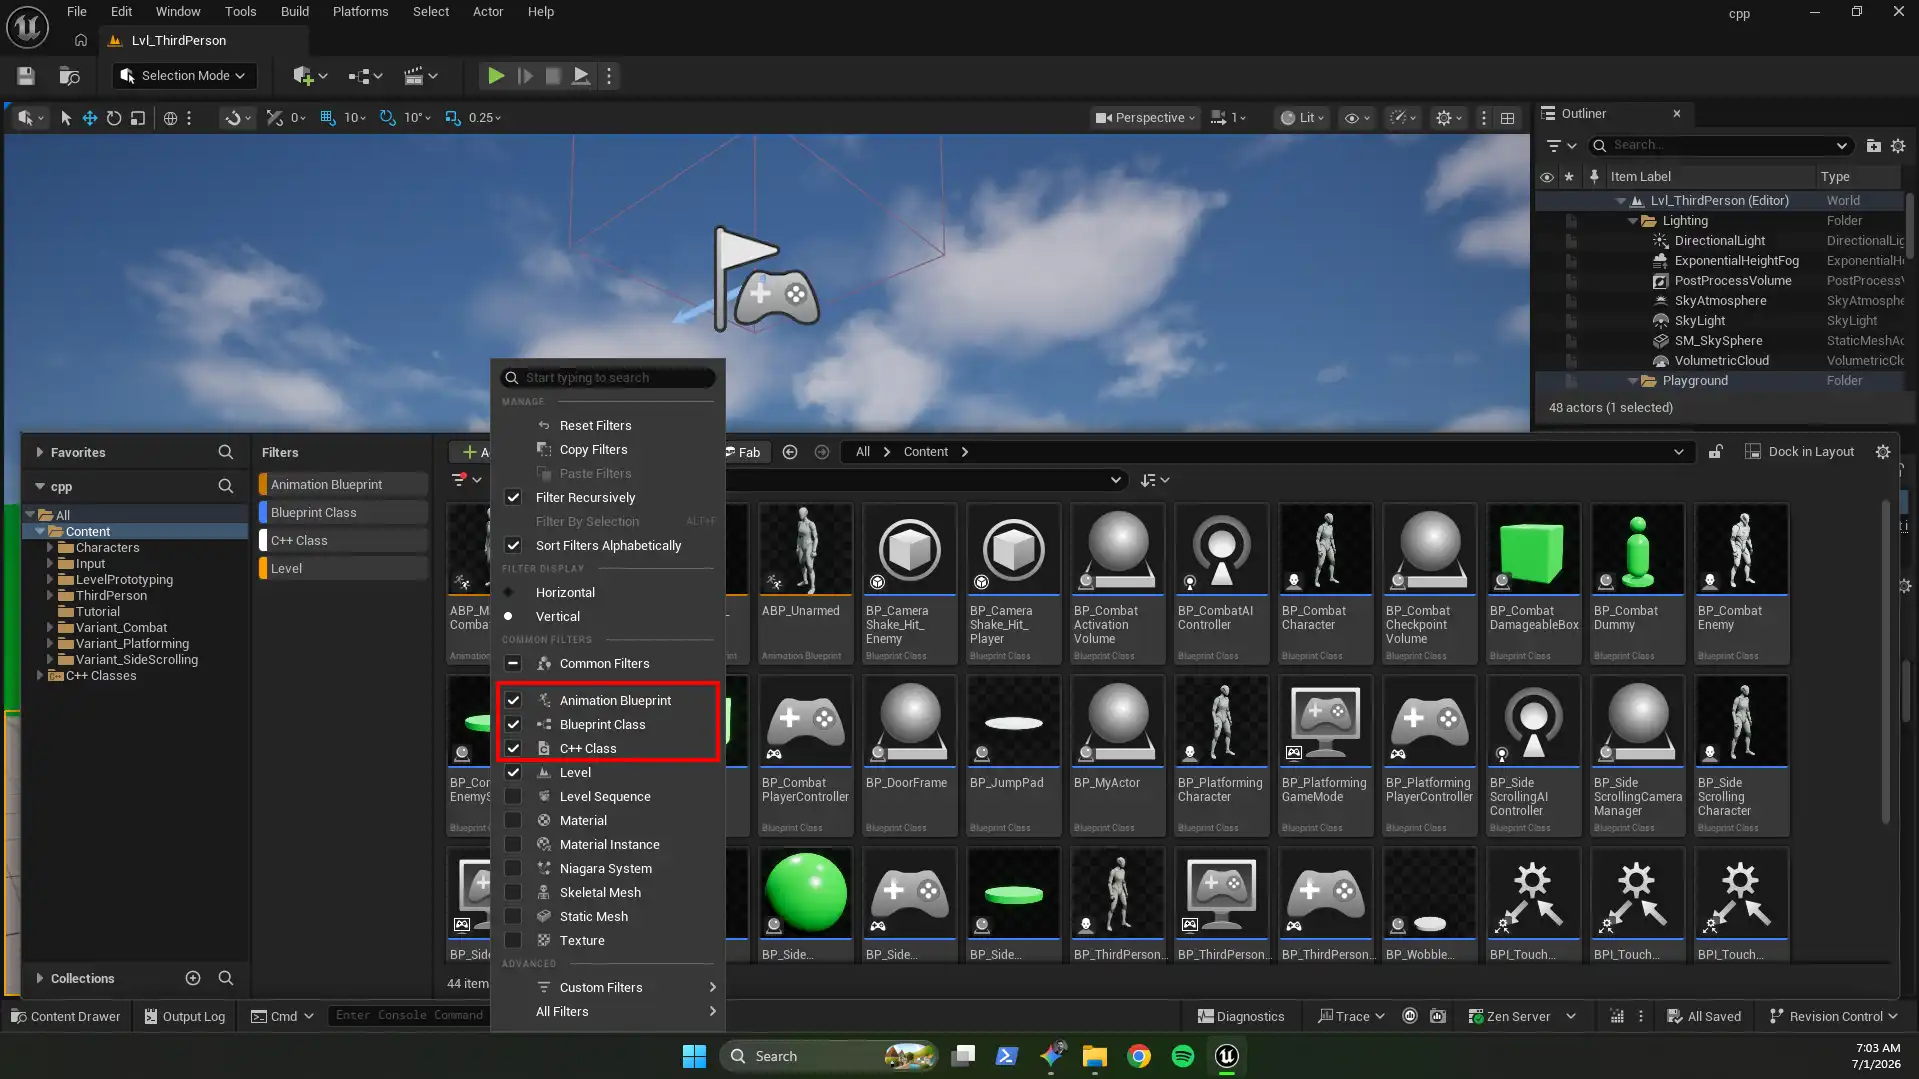
Step 5: Activate Logic Filters
In this stage, check the core script and structural filters needed for your context (e.g., Blueprints, Levels, Materials). However, make sure you do NOT select heavy textures or static meshes, because we only want text-based data like .T3D or .COPY files.
Step 6: Trigger Bulk Export
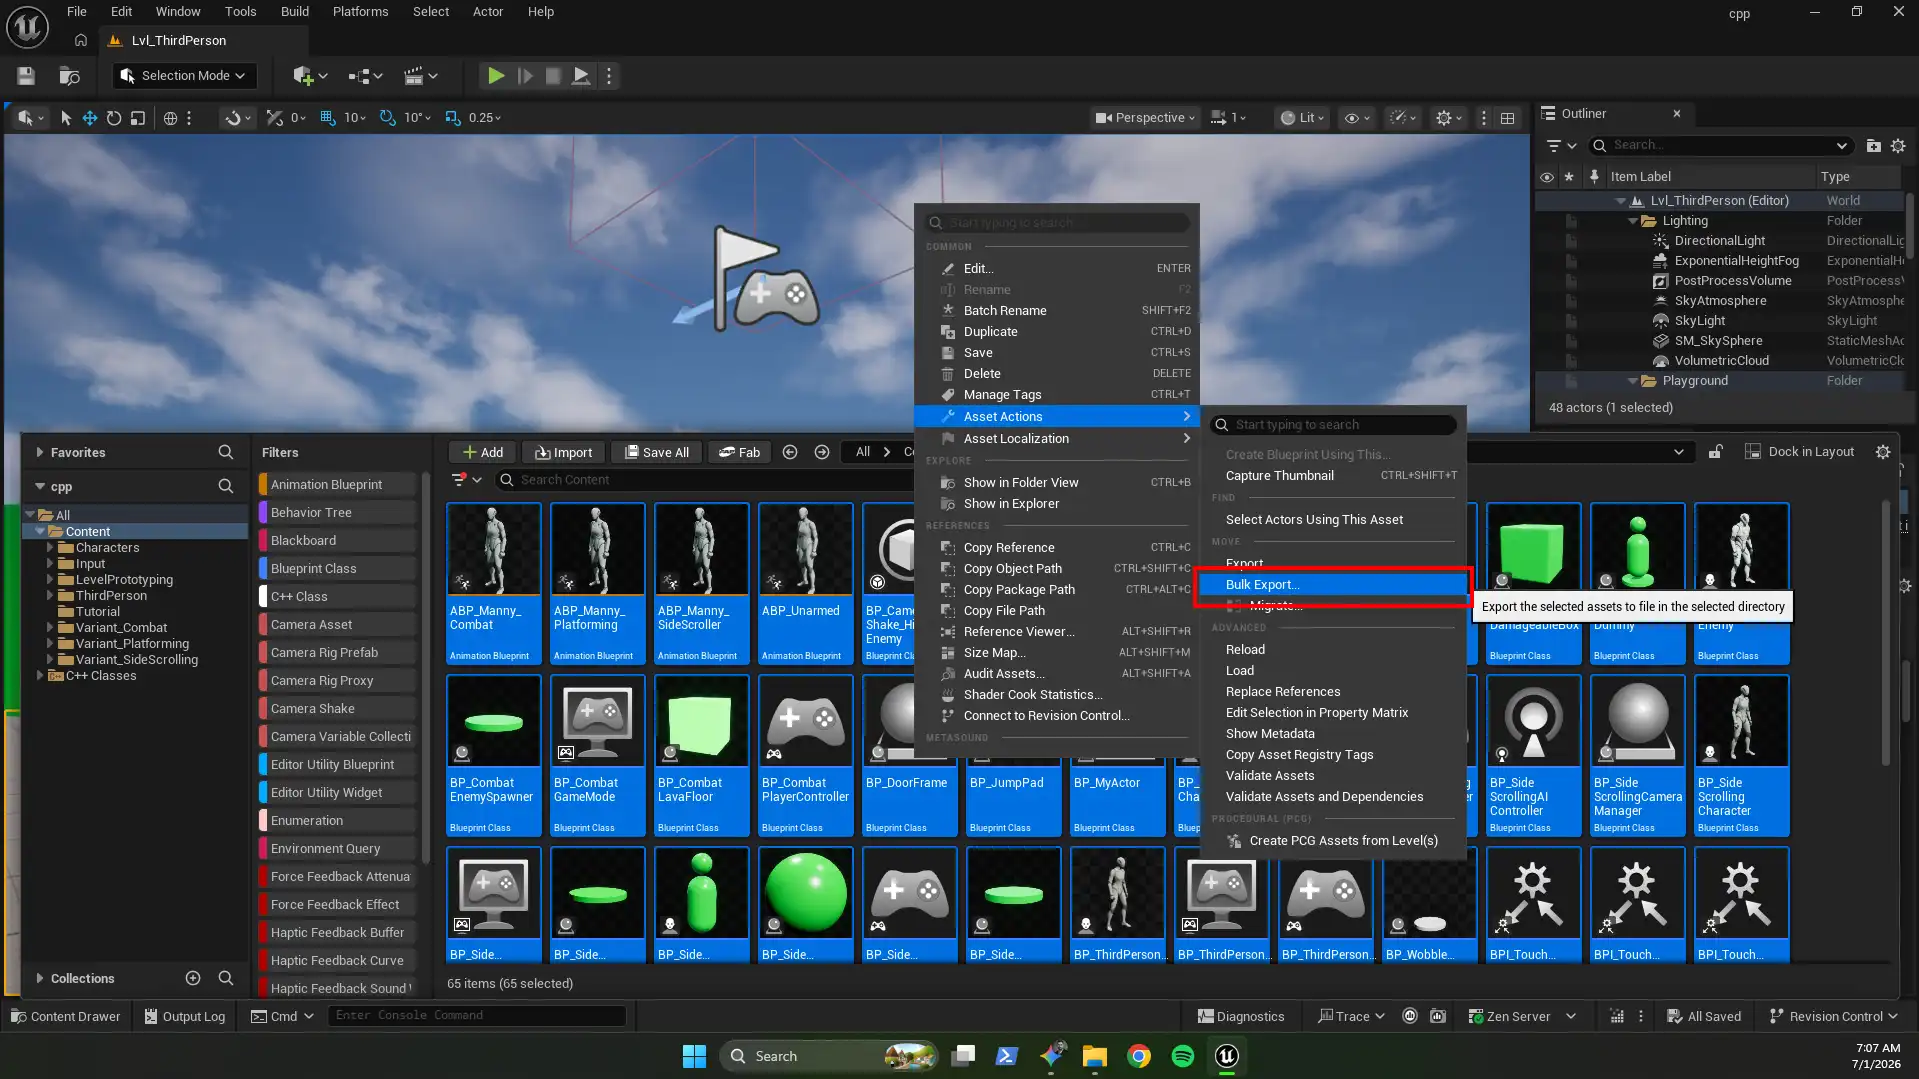
After filtering, press CTRL + A to select all filtered logic assets. Right-click and navigate to Asset Actions, then choose Bulk Export. This process ensures every level object and node keeps its precise coordinates and structural logic intact.
Step 7: Set Output Destination
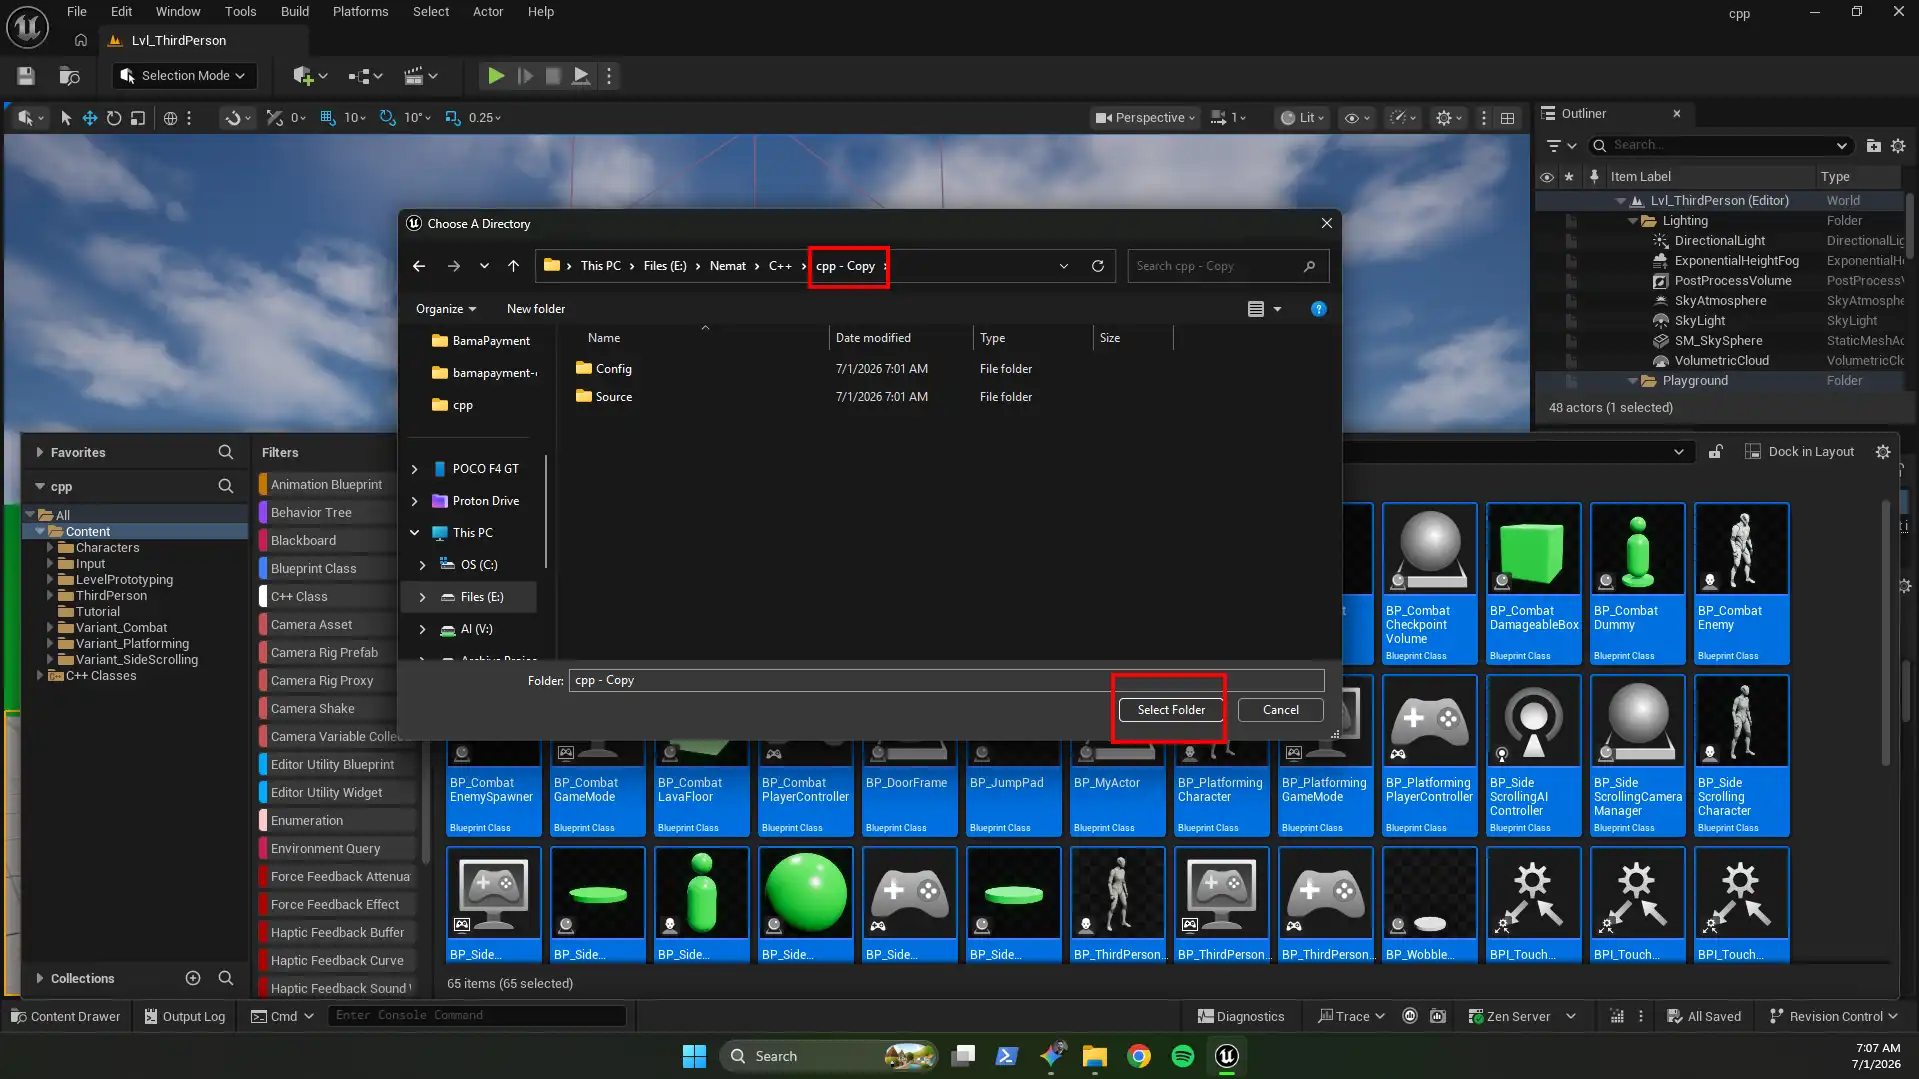
When the file prompt appears, choose the root directory of your duplicated/copied project folder as the target destination.
Step 8: Rename ‘Game’ Directory to ‘Content’
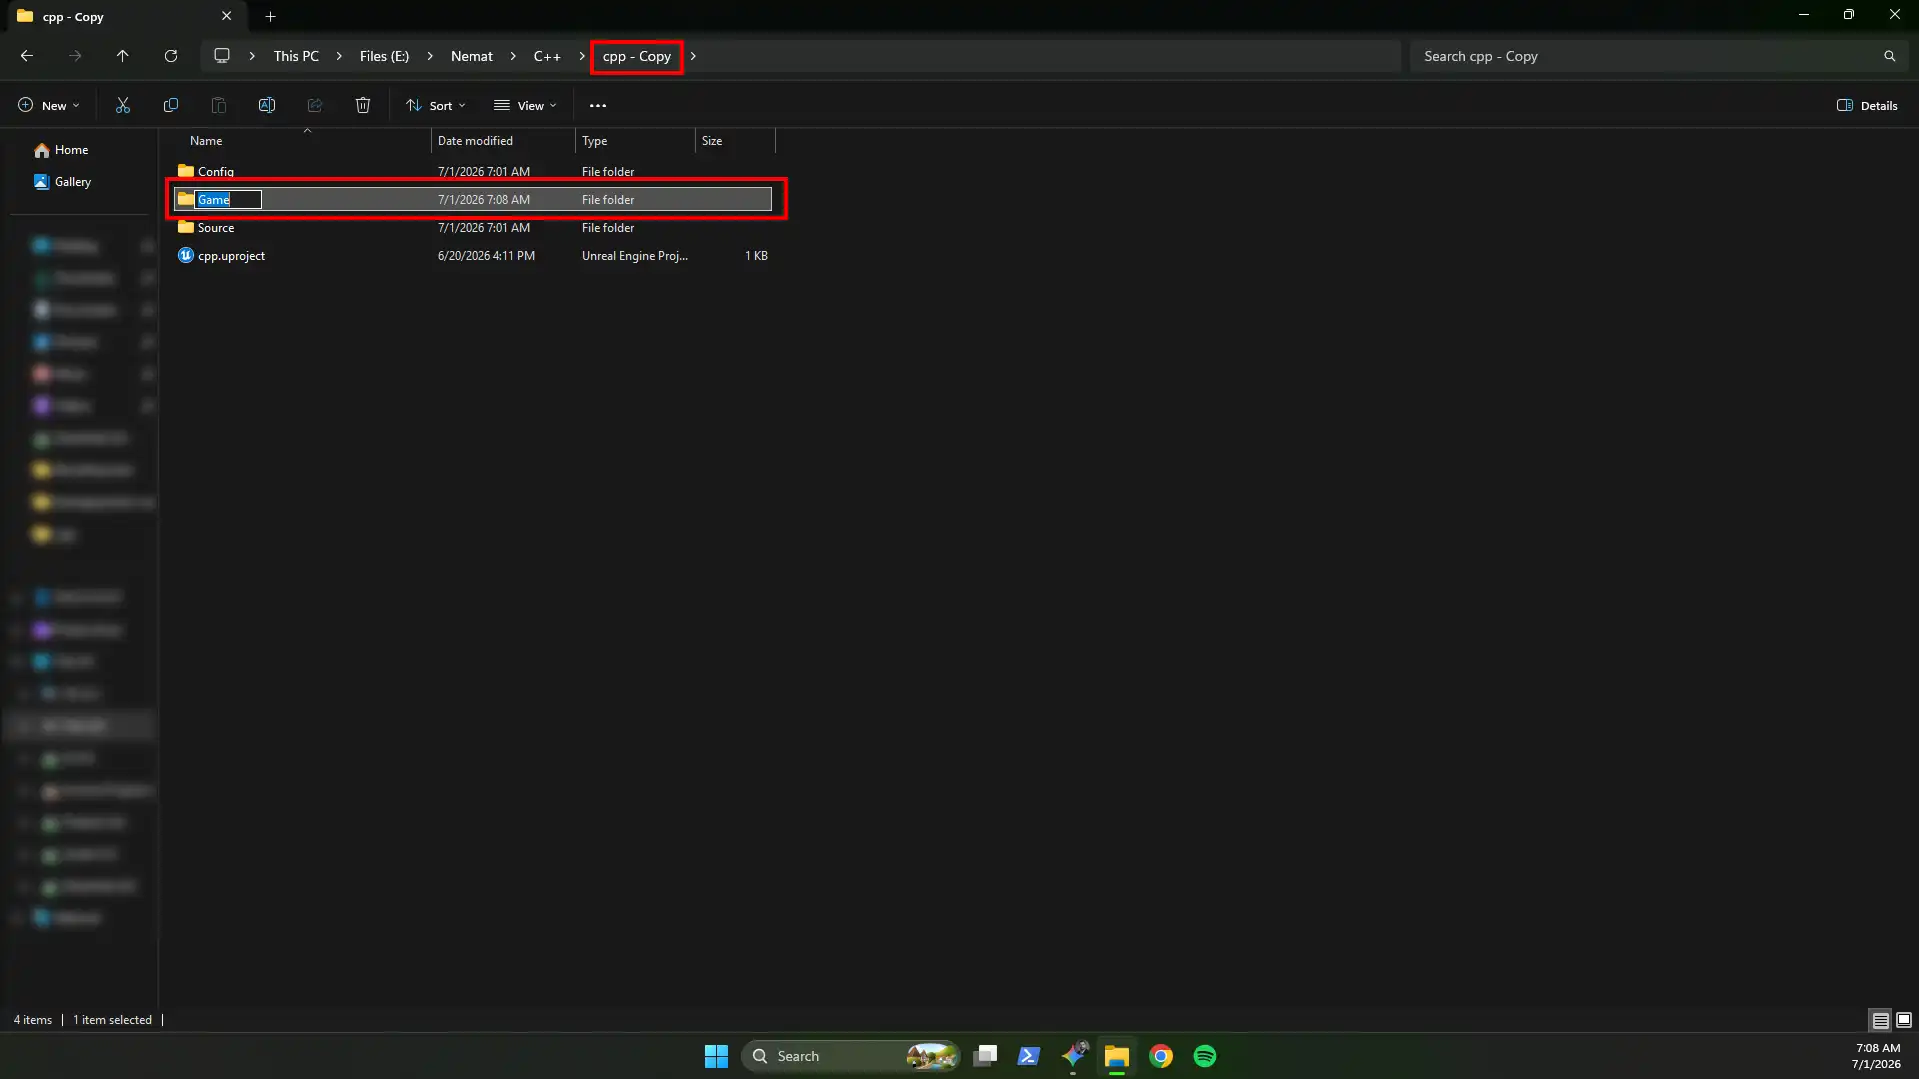
Unreal Engine will automatically create a folder named Game inside the copy directory. Therefore, you must manually rename this folder to Content so the project architecture matches exactly.
Phase 3: Generating the AI-Readable Context Asset
Now that our project directory contains text-based code instead of raw binary assets, we can stream everything into a single Markdown file.
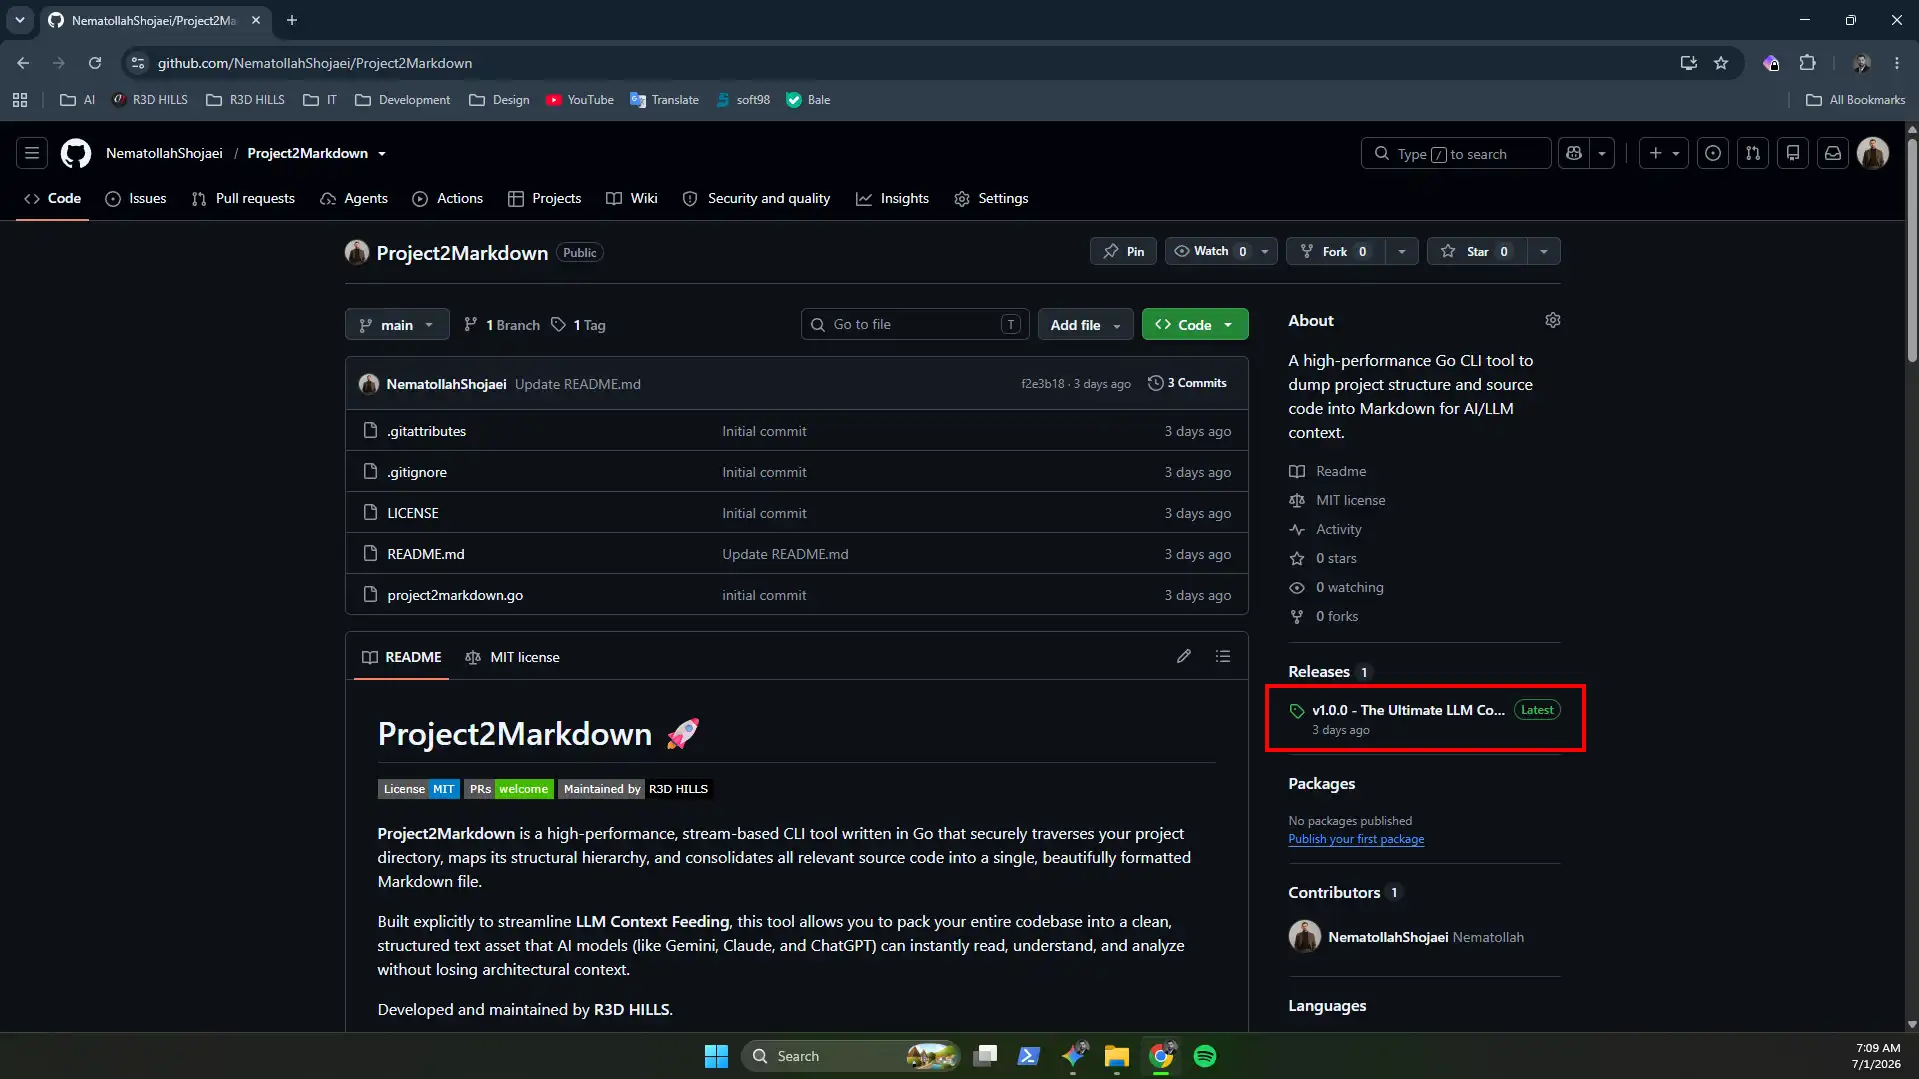
Step 9: Visit Project2Markdown Releases
Head over to the official GitHub repository and click on the Releases section on the right side of the page.
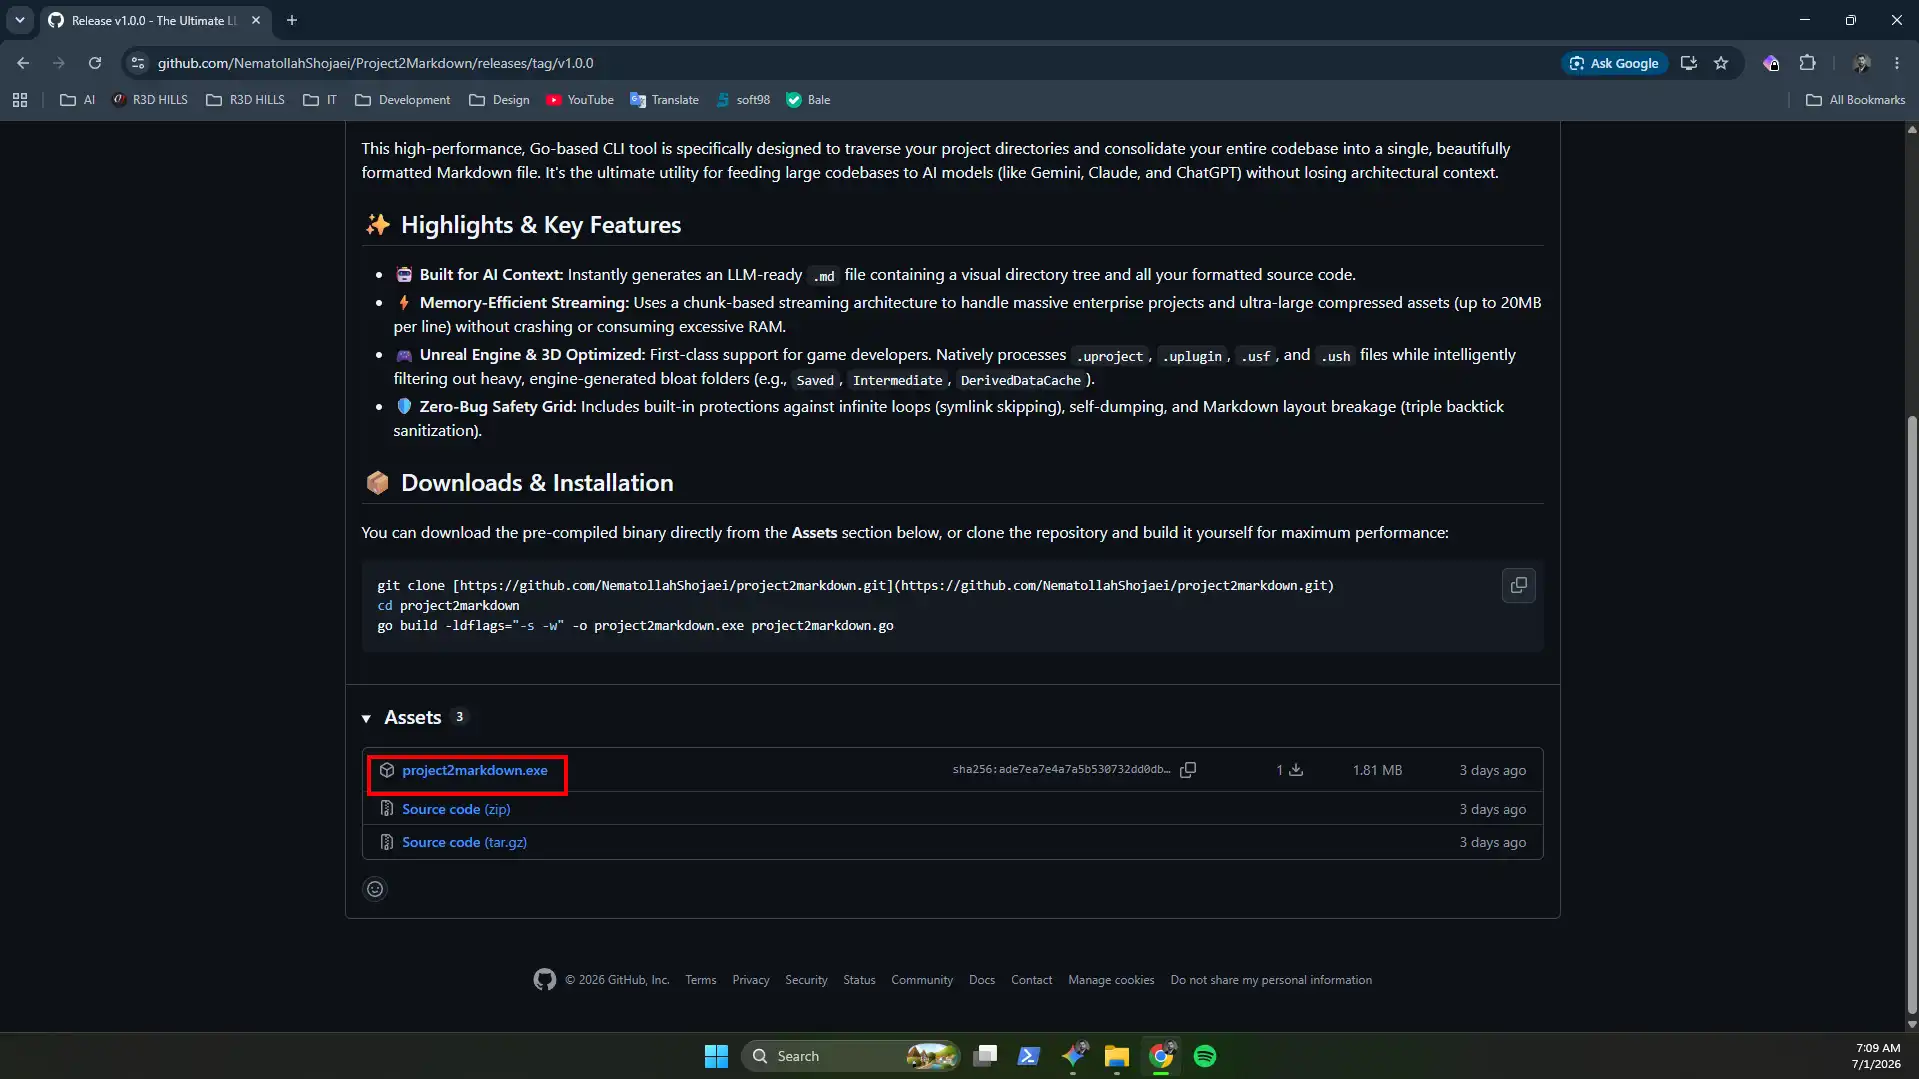
Step 10: Grab the Compiled Binary
Subsequently, download the latest production-ready executable (project2markdown.exe) onto your computer.
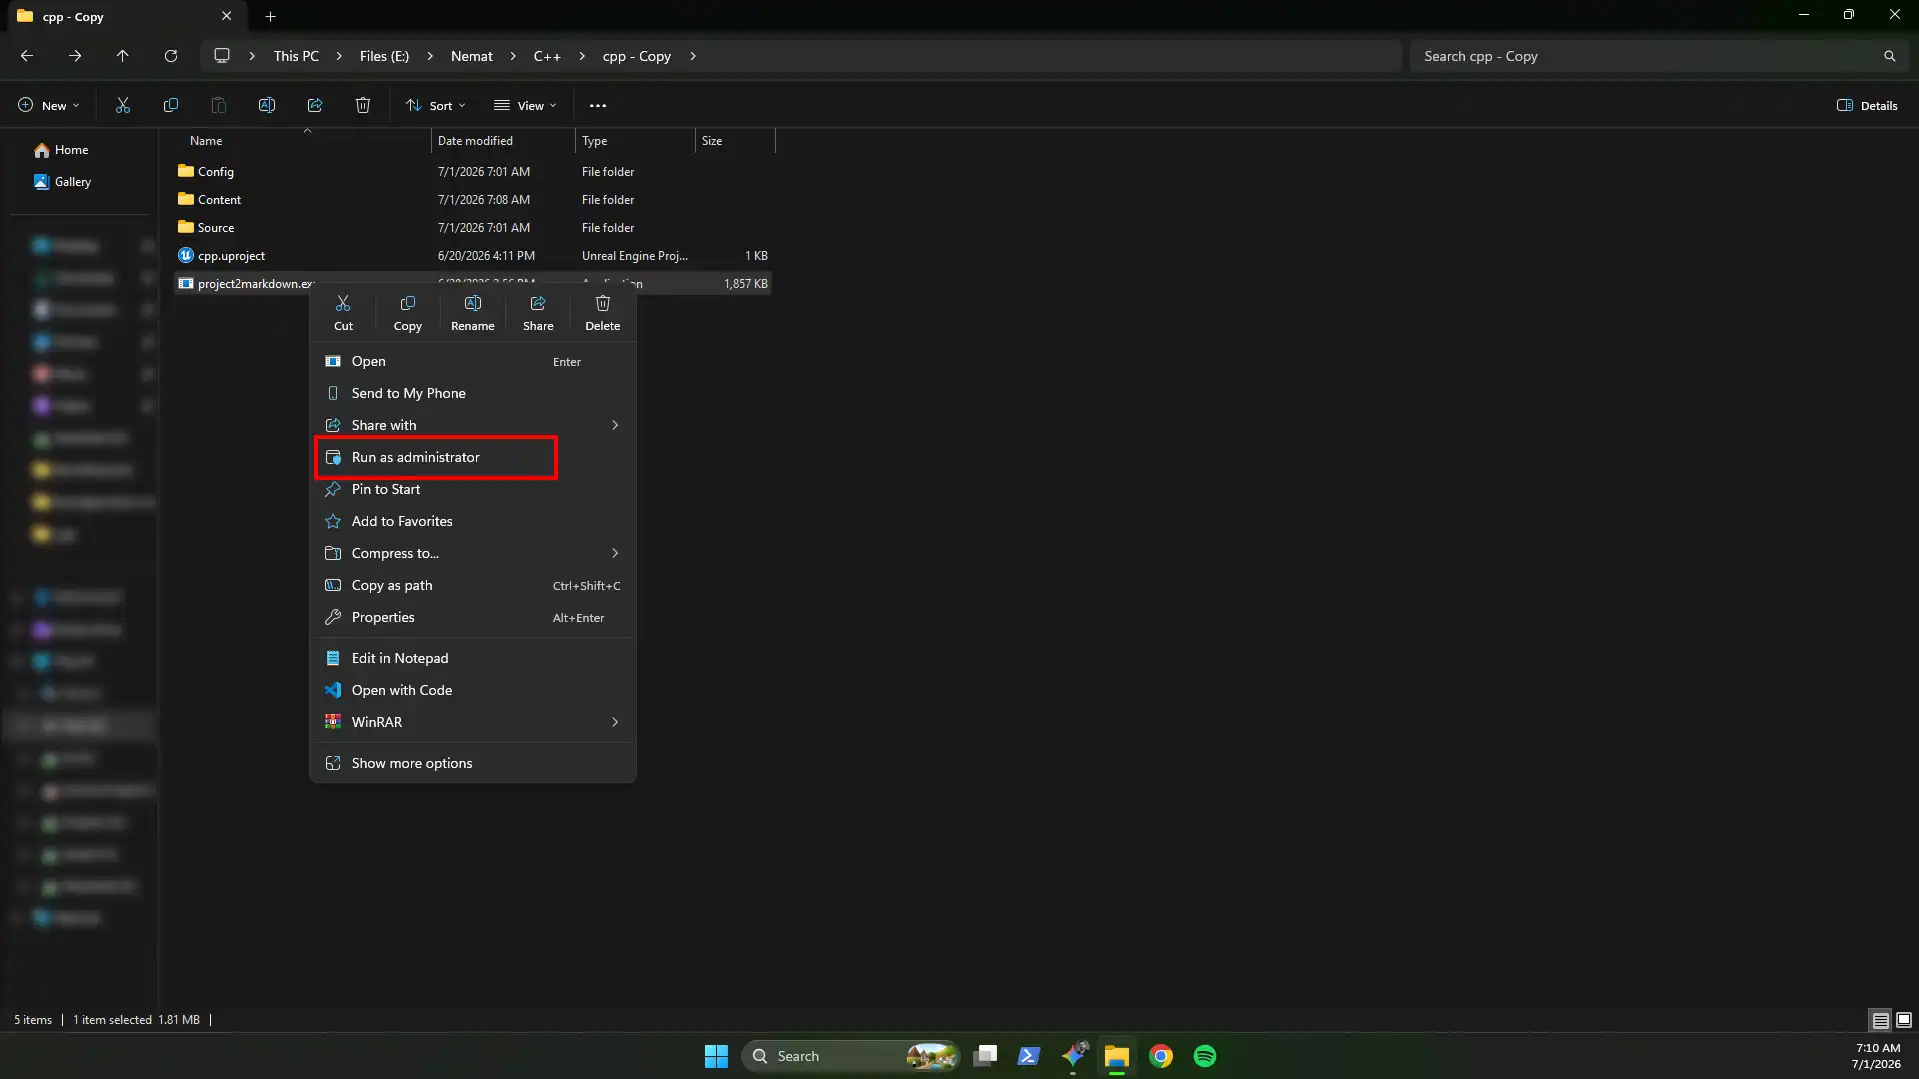
Step 11: Run as Administrator
Drop the downloaded executable directly into the root folder of your duplicated project directory. Right-click the tool and select Run as Administrator to allow efficient stream tracking.
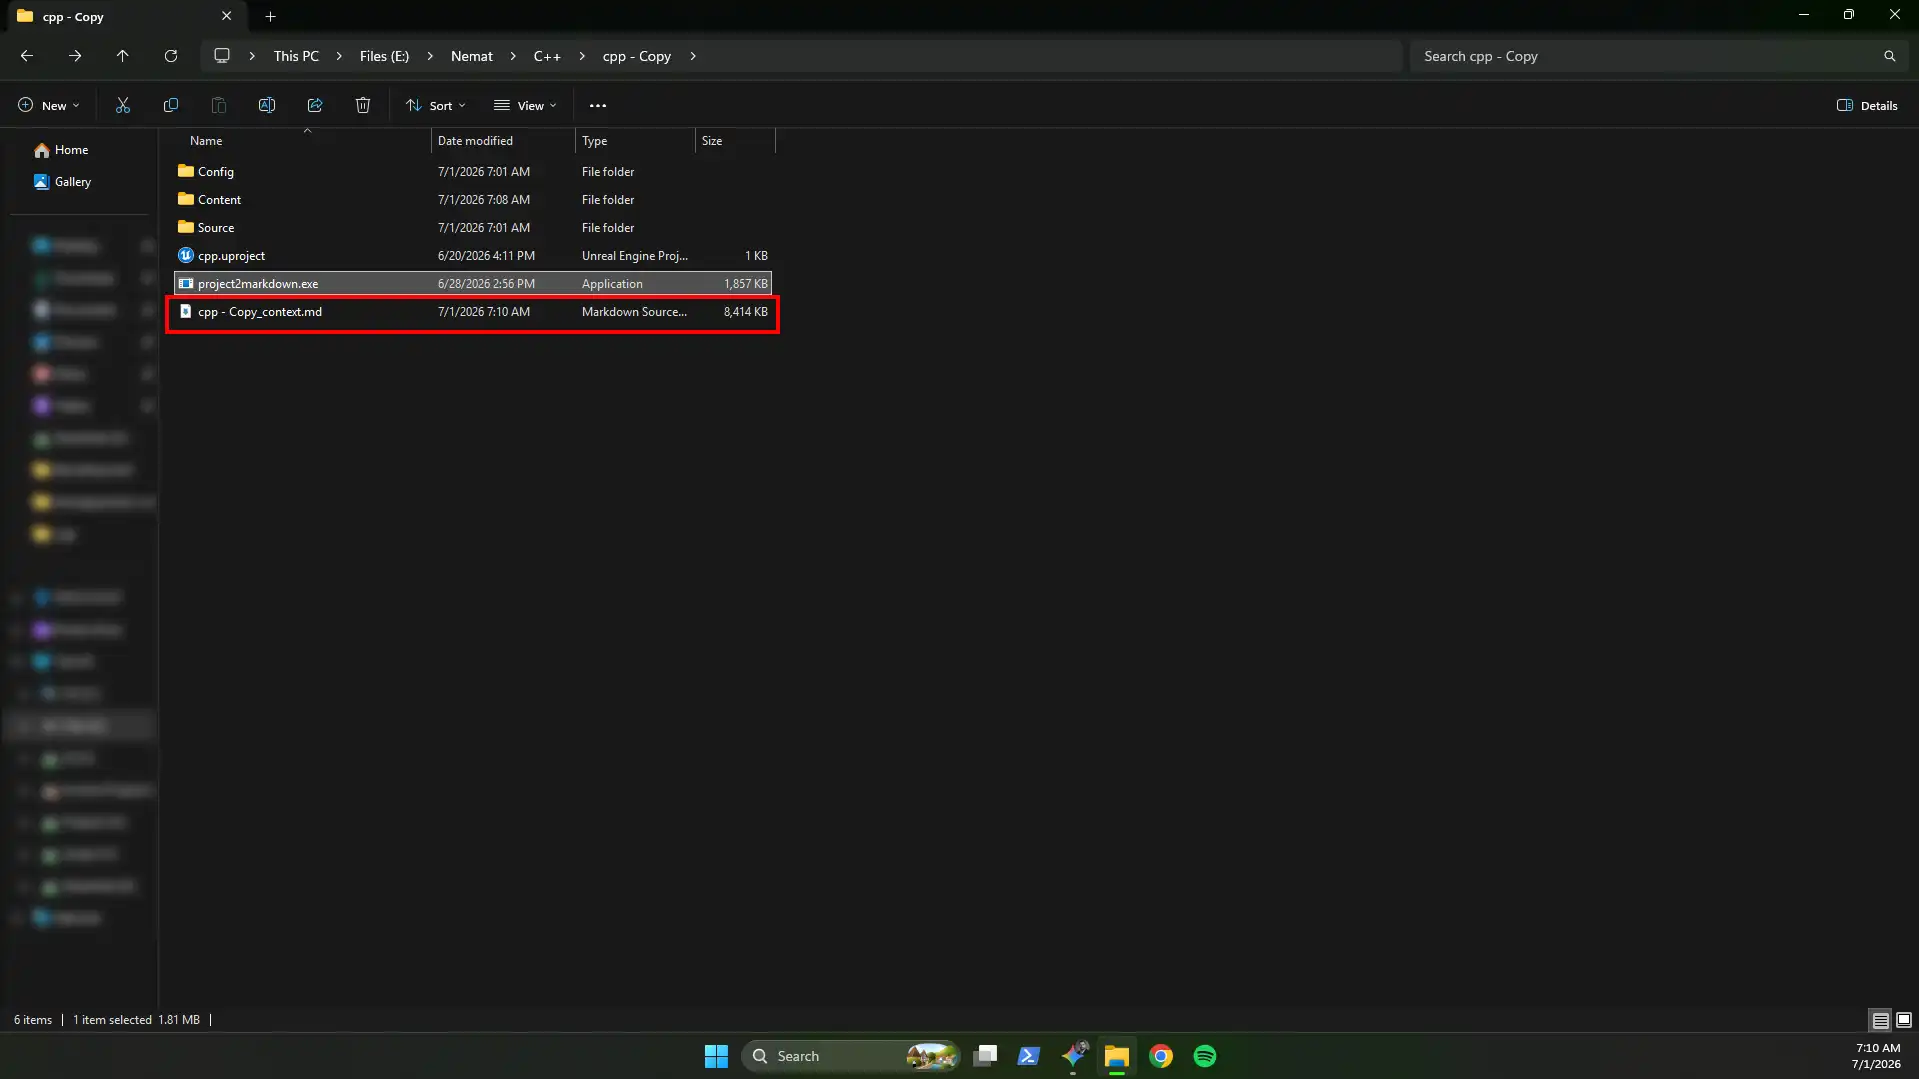
Step 12: Context Successfully Packed
The CLI tool finishes processing almost instantly. As a result, a neatly formatted Markdown document named [YourProjectName]_context.md is dropped directly into your folder, completely prepared for AI consumption!
Step 13: Upload to ChatGPT, Claude, or Gemini
Finally, open the generated file or drag-and-drop it straight into your favorite LLM. You can now prompt the AI to review level hierarchies, refactor massive blueprint logic systems, or trace complex code structures seamlessly.
Want to understand the core technology behind this tool? Learn more about its memory-efficient Go pipeline in our full core review: